I am often asked about the mould making and casting process of artwork.
I have put together a Step by Step guide as to how I go about the initial silicon and fiberglass moulding process.
Below this, you will find further information on the wax, ceramic and final bronzing of the piece.
You are welcome to contact me should anything be unclear.
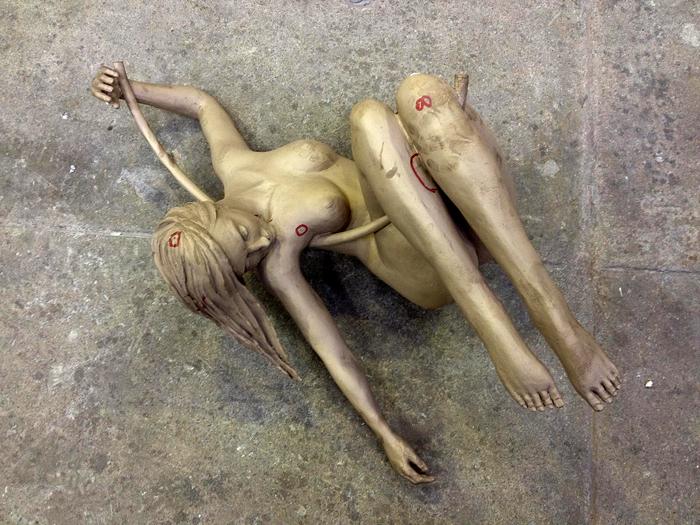
STEP 1: Once your final piece in clay is complete it will be ready for the mould making process.
The first layer of a runny mix of silicon is painted on to the piece - to pick up all the fine details.
STEP 2: A 2nd layer of silicon is painted on to the now dry piece. Thixotrope is added to thicken the silicon.
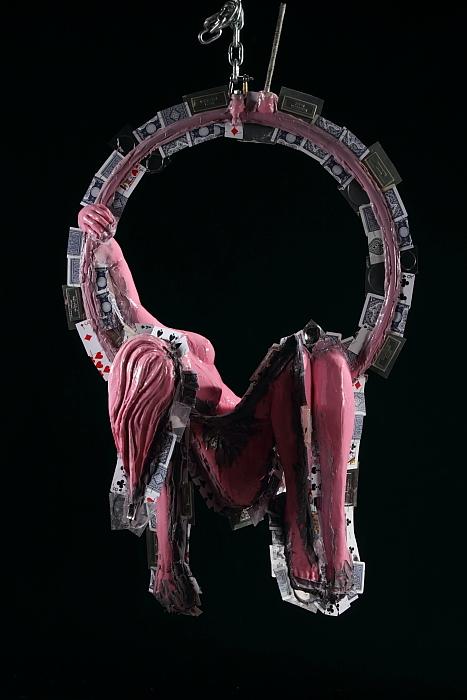
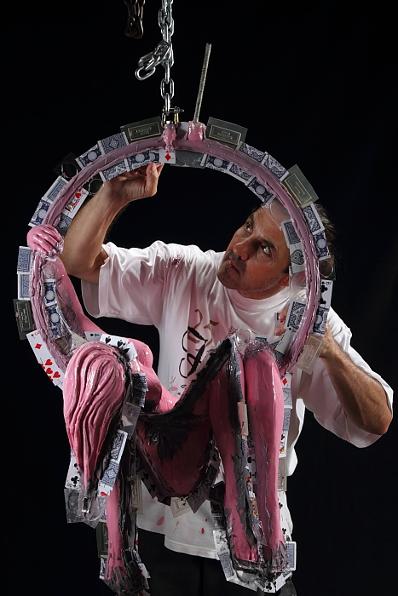
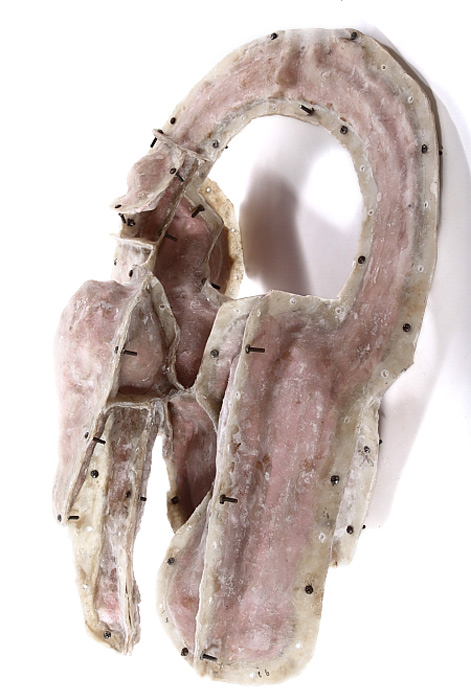
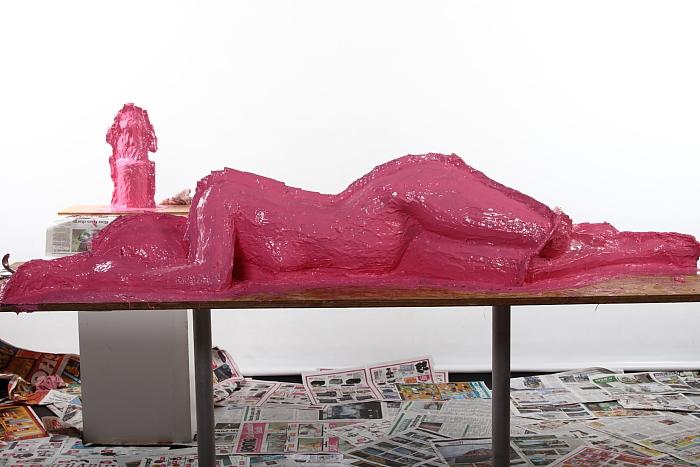
STEP 3: Once dried, a 3rd and final layer of silicon is painted on the piece. All nooks and crannies are filled with the silicon rubber. Then playing cards are inserted to create divisions and 'keys'
STEP 4: Silicon walls, division for walls and building up of walls
STEP 5: Playing card walls for resin. Visual of clay & 'keys'
STEP 6: Mixing resin
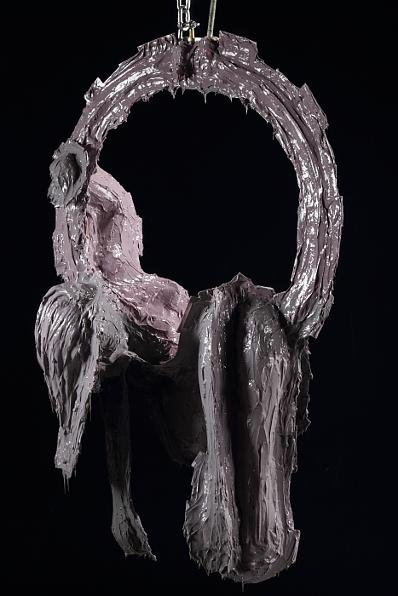
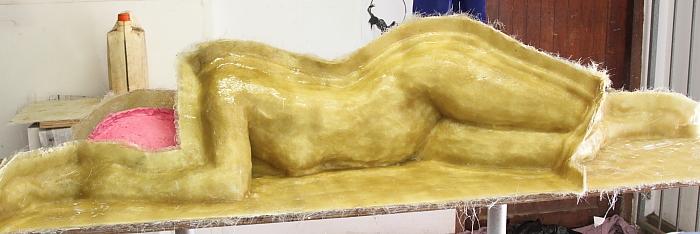
STEP 7: Fiberglass matt and resin - first layer
STEP 8: Second fiberglass matt & resin (keys exposed)
STEP 9: Third fiberglass matt & resin (visual of finished side)
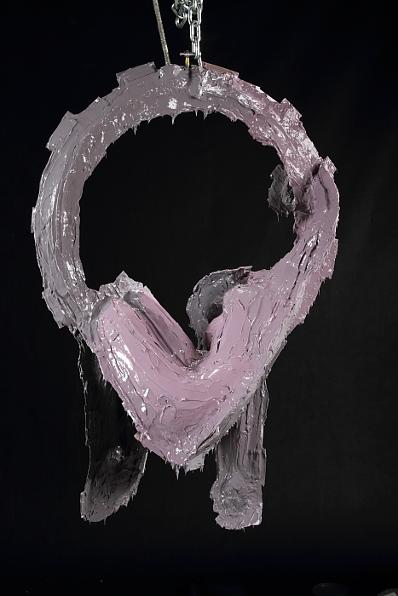
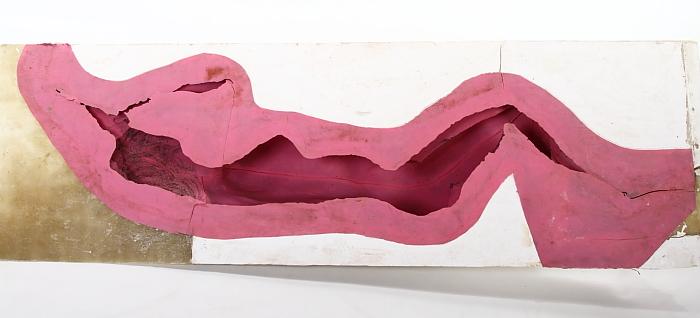
STEP 10: DE-MOULDING
Trimming fiberglass edges and drilling holes
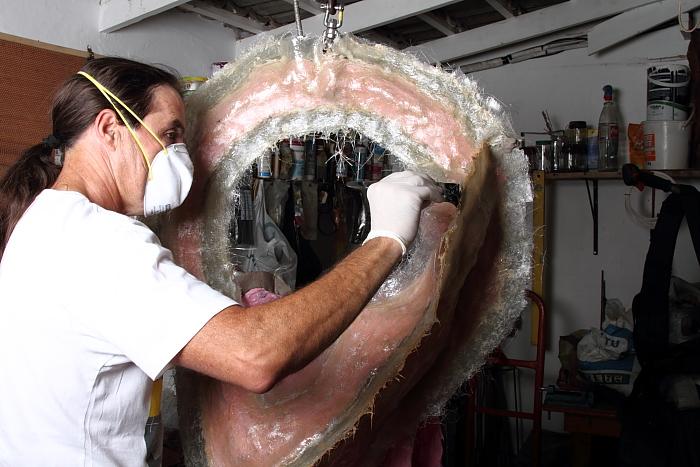
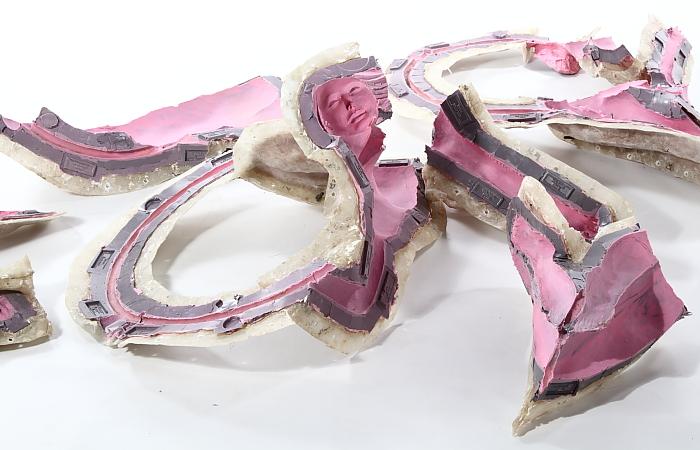
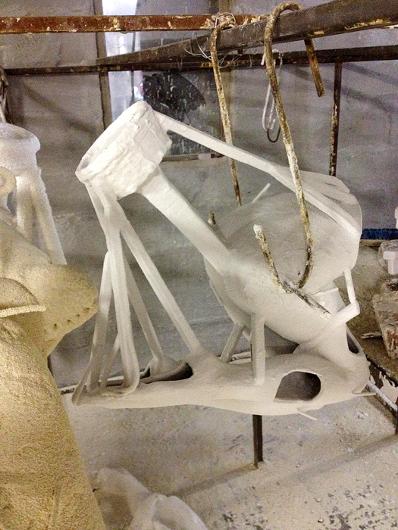
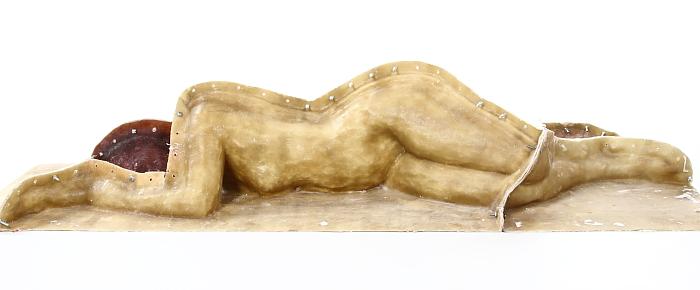
STEP 11: Taking the fiberglass mould apart to remove original clay work
STEP 12: Taking original clay piece out and checking.
You will notice that the clay piece is missing its forearms and the teddy bear. These were removed and will be cast separately, making the mould making and casting process easier at the foundry. The two parts will eventually be welded back together in the foundry.
If you go back to Step 11, you will notice that the teddy bear attached to the forearms was in the pyramidal mould that I opened.
FINAL STEP 13: Re-assembling the mould - ready to send to the Foundry.
Below are still photographs of the same mould-making process.
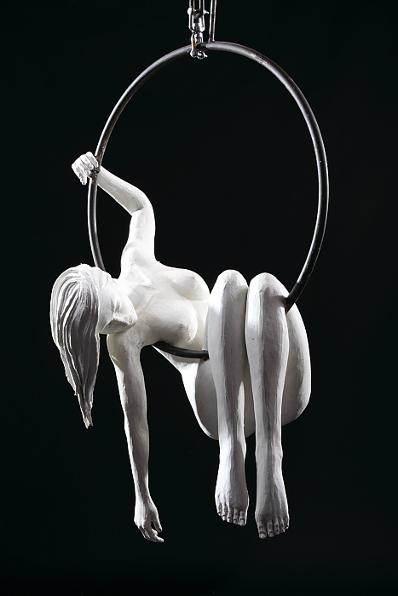
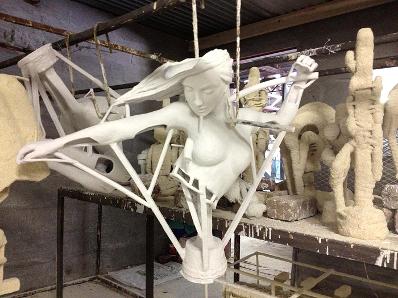
The final piece in modelling clay ready for mould making
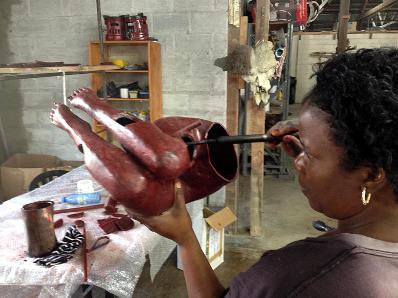
The first layer of silicone is painted onto the clay picking up the detail
Placing playing cards and chocolate moulds that create the splits and keys in the separate pieces

Painting on the second layer of silicone adding to the thickness of the mould

Third silicone layer completed
The clay inner piece is finally removed and the mould sent off to the foundry for bronze casting via the lost wax process.
Making the ceramic waste-mould:
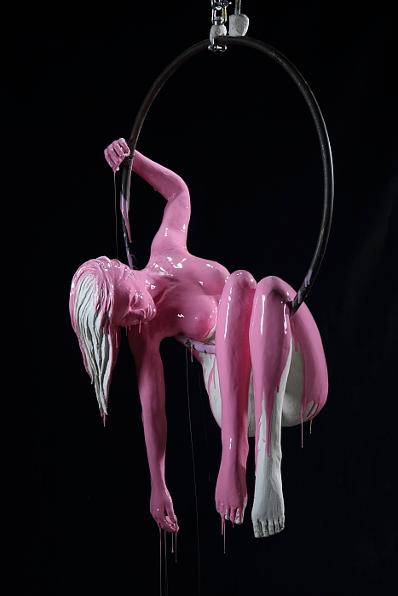
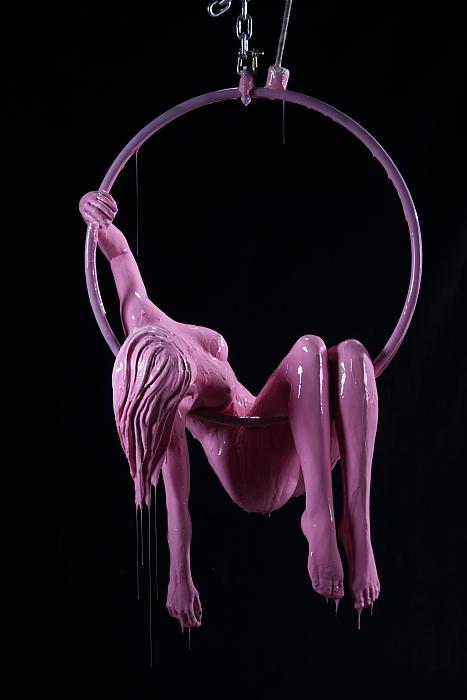
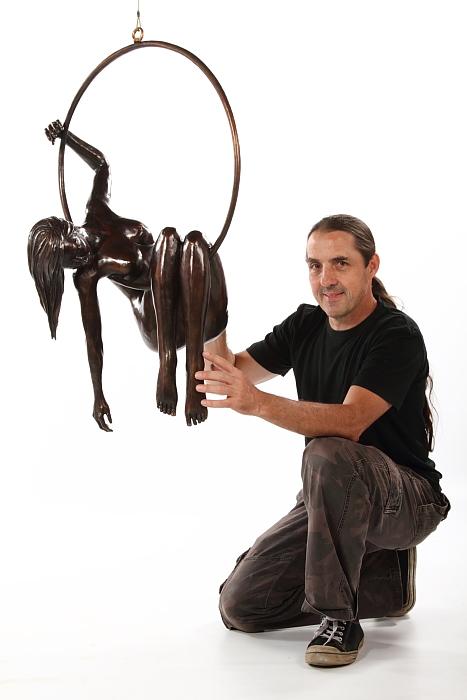
'The Stillness Between Holding On & Letting Go'
The Silicone mould is used to cast wax copies for each bronze edition (15). Each wax is then used to make a ceramic waste-mould
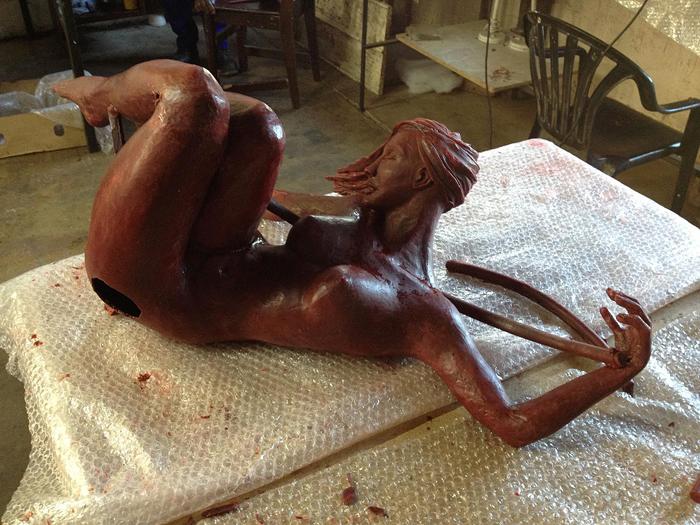
Each wax piece has vents and a funnel attached to allow air bubbles to escape during the pouring of the metal. These are removed in the bronze stage using an angle-grinder.
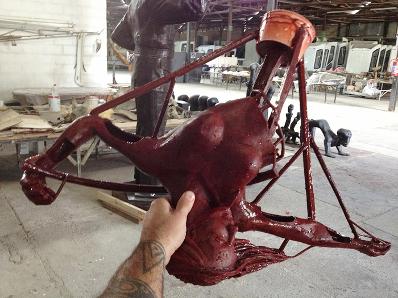
The wax pieces are dipped in liquid ceramic seven times to create the ceramic waste mould with thick enough walls to survive the heat of the molten bronze.
Casting the Bronze:
'The Stillness Between Holding On & Letting Go'
The raw liquid Bronze is removed from the furnace.
'New Age Bronze' also called 'Everdur Silicon Bronze 95-4-1' is constituted of:
95% Copper 4% Silicon and 1% Manganese
as opposed to other bronzes normally made up of tin, zinc & copper.
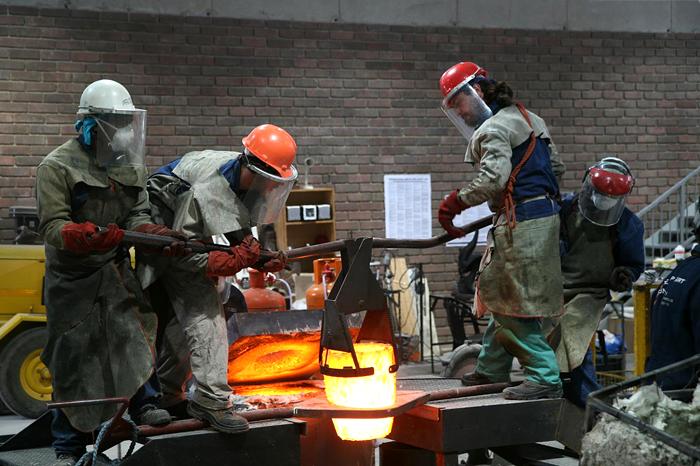
The Liquid Bronze is poured into the ceramic waste moulds
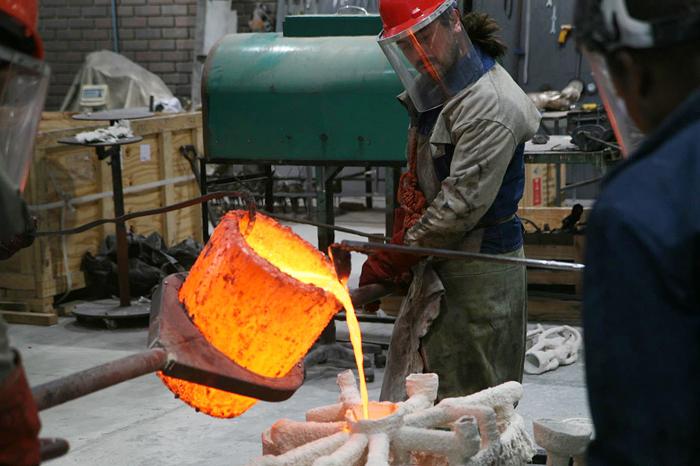
Hot Bronze solidifying in the waste moulds
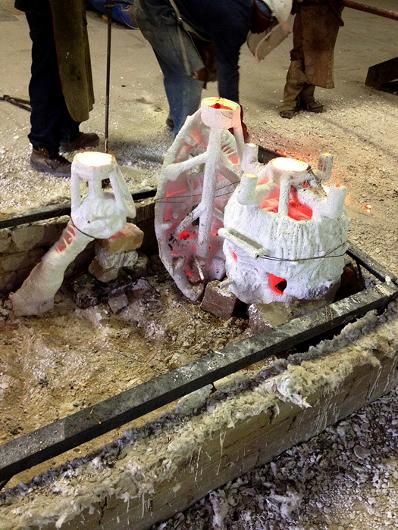
Cast Bronze Pieces are removed from the waste mould
The ceramic waste mould is removed from each piece and the vents and funnel are removed
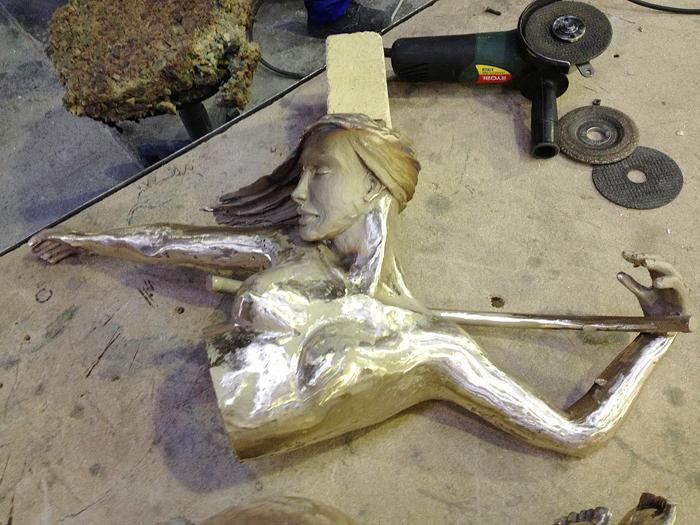
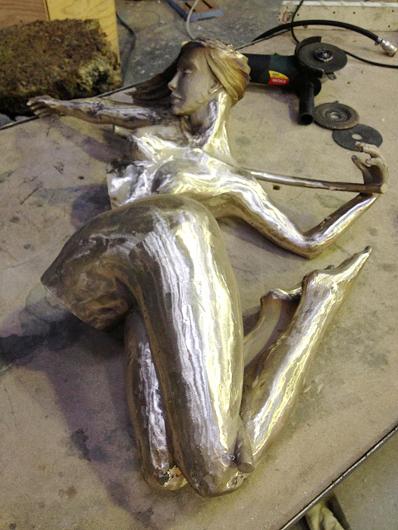
Assembling all the pieces which are welded together
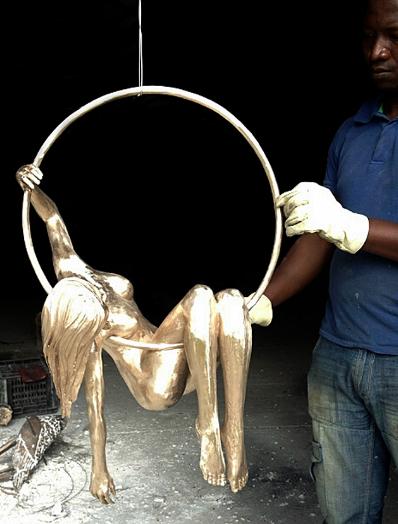
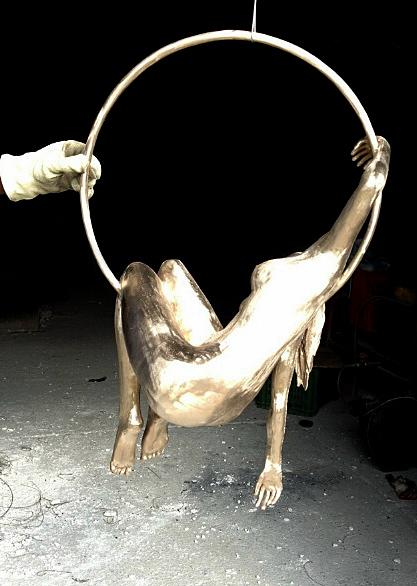
The final cast bronze complete - buffed and assembled
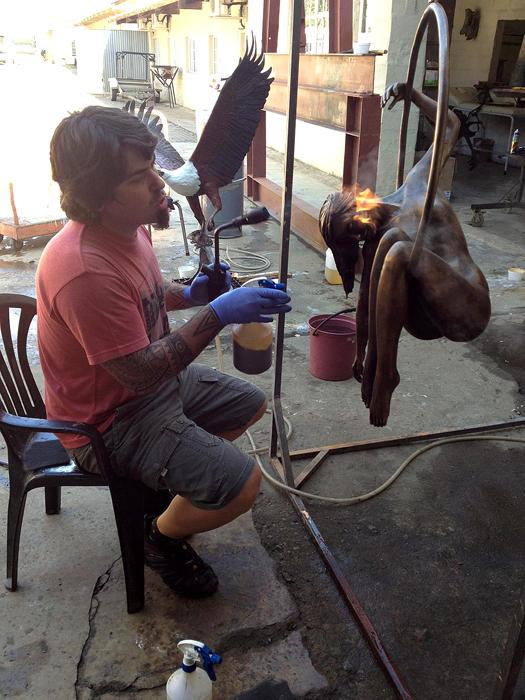
Applying the Patina:
'The Stillness Between Holding On & Letting Go'
Michael, from The Loop Art Foundry, achieves the correct Patina using various chemicals and a blow-torch to set the final colour of the bronze - The patina can be any colour from pure white to pure black!
Ready for your home:
'The Stillness Between Holding On & Letting Go'
Completed bronze with patina
In-Fran-Gible
The first layer of silicone is painted onto the clay picking up the detail
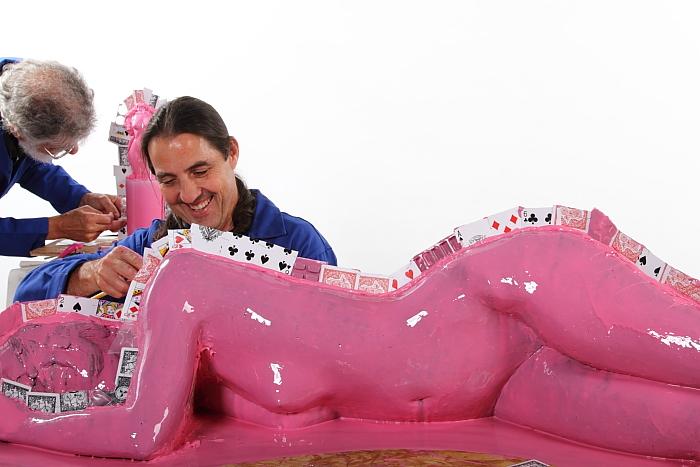
Placing playing cards and chocolate moulds that create the splits and keys in the separate pieces
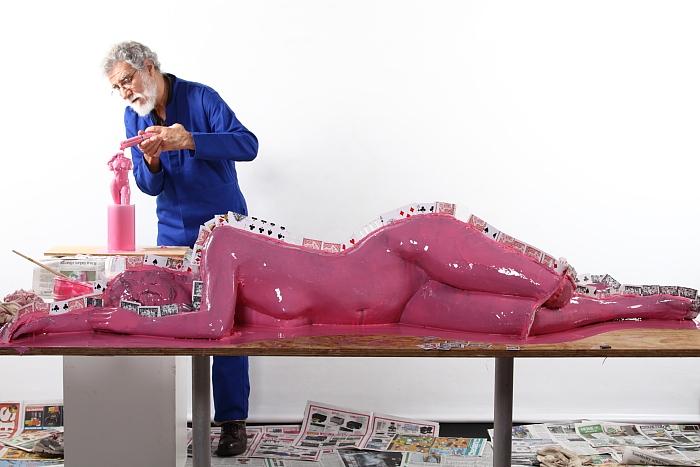
Painting on the second and third layers of silicone adding to the thickness of the mould
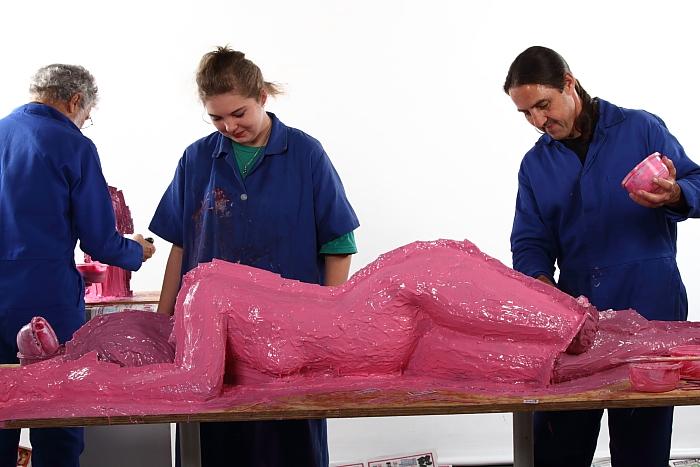
Painting on the third layer of silicone adding to the thickness of the mould
First fibreglass layer with walls splitting the mould into convenient pieces
The mould is trimmed and drilled for bolts which help to maintain the true fit.
The original piece is finally removed and the hollow mould sent off to the foundry for bronze casting via the lost wax process.
Cleaning Bronzes? I'm often asked about how to clean bronze sculpture and it’s really much simpler than you may think. Bronzes by their very nature require very little maintenance.
The very last step in the foundry process is when a coat of wax is applied to the bronze piece. This helps create a barrier to humidity in the air that can cause the bronze to oxidize / ‘go green’. It also creates a pleasing sheen to the piece. Waxing is usually done when the bronze is still warm as it allows the wax to enter the pores of the bronze. This layer of wax will last at least a year – unless the piece has accidentally been cleaned aggressively with an abrasive cleaning product. Never use Handy Andy or anything similar as this will strip the patina off the surface!
Dusting: Use a soft, clean cloth to dust. Once a fortnight is fine.
Cleaning: Only if the piece is very grimy will this be necessary and then simple mild soap and water will do the trick. Use a few drops of mild, unscented dish-washing liquid in a bowl. Dampen a cloth and wipe down – use a soft toothbrush to get into any fine grooves or intricate detailed areas.
Rinse the cloth and wipe down with clean water to remove the soap residue. Don’t pour water over and onto the sculpture as the base often has felt underneath it and the water may damage this.
Allow the piece to dry completely before waxing. (You don’t want any moisture on the piece when you apply the wax layer. So allow to dry for + 3 hours.)
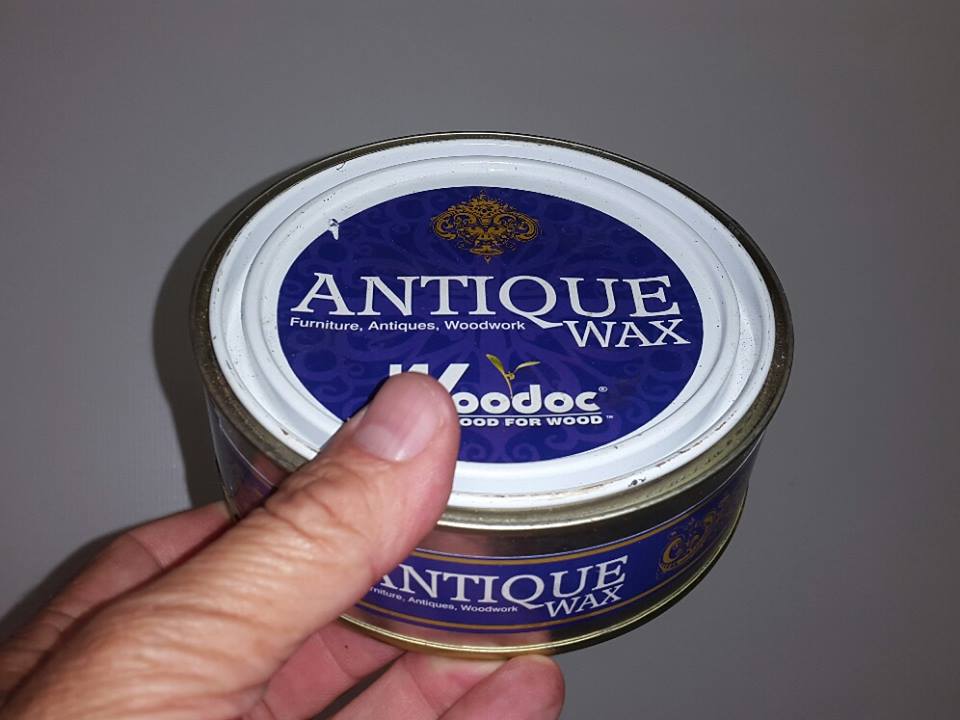
Waxing: Only use a plain clear paste wax. See the picture here of one that is locally available from any good hardware store. It is called “Antique Wax” and is made by Woodoc. (The smallest tin is fine as you need very little of it).
Using a soft clean rag, apply a light thin coat and allow to dry (+ 20 minutes.) Then buff with a soft, clean cloth like you would a shoe.
If the piece lives outdoors you could apply a second coat. Waxing only needs to be done once a year.
Pieces are available at:
(Click on the names below to link you to the galleries' websites)
CAPE:
Art@Africa Gallery – V&A Waterfront in Cape Town
Asara Wine Estate, Hotel & Art Gallery - Stellenbosch, Western Cape
Fine Art Africa Gallery - Hout Bay, Cape Town
Gallop Hill Gallery - Franschhoek, Hermanus & Plettenberg Bay, Western Cape
Benguela Cove Gallery - Hermanus, Western Cape
You & I Gallery - Robertson, Cape
Art@Cornerstone - Hoekville, Western Cape
St Francis Bay Gallery - St Francis Bay, Eastern Cape
KWAZULU NATAL:
Riverbend Art & Wine Gallery - KZN Southbroom
The Gallery Lifestyle, Ballito, KZN
The Platform Art Gallery - Lions River, KZN Midlands
FREE STATE:
Blou Donki - Clarens, Free State
MPUMALANGA:
Dimitrov Gallery - Dullstroom
GAUTENG:
The Melrose Gallery - Johannesburg
The Candice Berman Gallery - Johannesburg
The Showroom Art Gallery - Pretoria
St Lorient Art Gallery - Pretoria
NORTH WEST PROVINCE:
Marke Meyer Art @ De Handelspost Sentrum - Hartbeespoort
Werner Wehnholdt - Cell: 083 703 7586
BELGIUM:
Annemarie Durnez Interior Designer & Gallery- Belgium
All quality castings by:
Pro Art Bronze Foundry - White River, Mpumalanga
&
Bronz Editions - Western Cape
Chroming by:
Coating Graphics - Centurion, Gauteng